



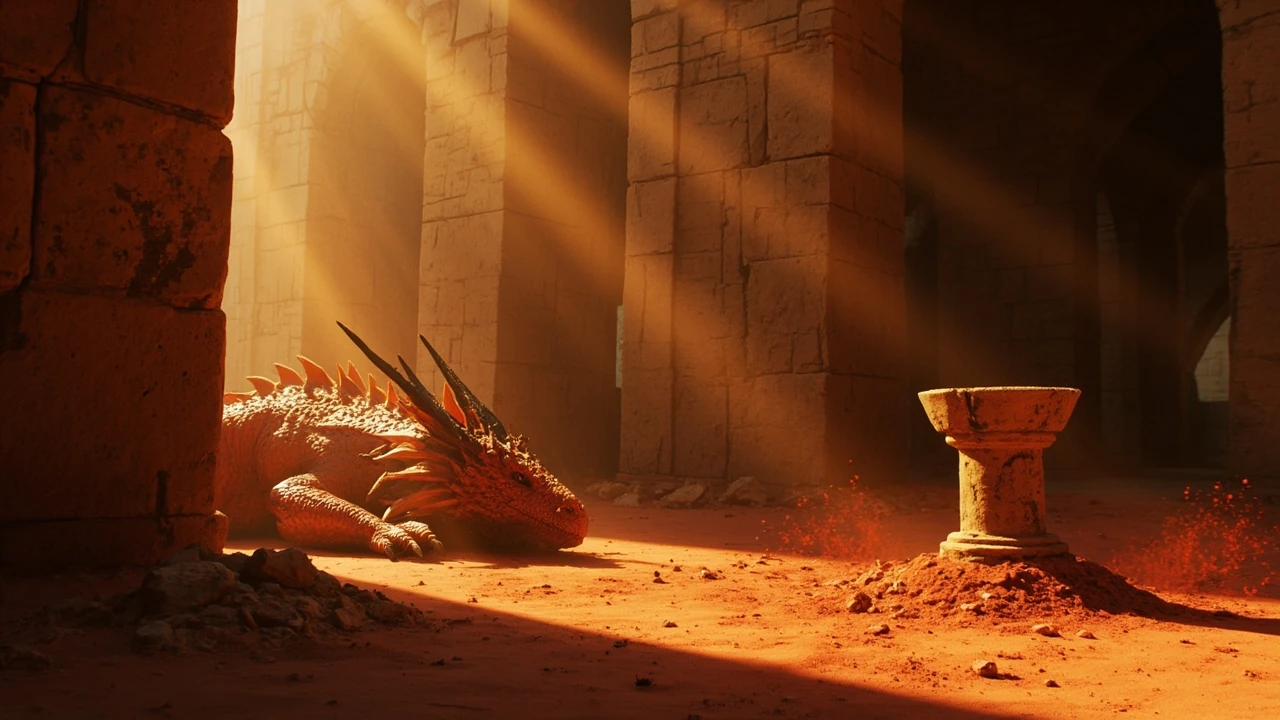

Crimson Desert dragon stone chamber: what it is and why players stop here
The Crimson Desert dragon stone chamber is one of the more discussed optional dungeons in Pearl Abyss’ open world, and it earns that attention through a specific combination of friction and reward. The site sits in a highland section of the Pywel continent, behind a rappel approach that kills careless routing, a three-room puzzle layer that punishes guesswork, and a boss encounter that gatekeeps its own loot table. Players who clear it cleanly take home a rare crafting reagent, a unique mount cosmetic, and a small batch of high-tier equipment that remains useful into the late-game balance pass.
What separates the chamber from a typical side dungeon is how the difficulty is distributed. The approach is the first real filter, since the canyon route is built to dismount anyone who tries to ride through it. The puzzle layer is the second filter, because each of the three rooms has a single intended solution and at least one decoy that wastes a run. The boss is the third filter, since the stagger check in phase three is tight enough to override raw damage output. A guide is useful here because the chamber rewards preparation over improvisation, and most of the time loss in public runs comes from small decisions made before the first puzzle room opens.
This walkthrough covers the route, the prerequisites, the three puzzle rooms, the boss phases, the loot table, and the build choices that tend to hold up in practice. It is written for a player who has already cleared at least one main-story chapter in the Pywel region and who wants to decide whether the chamber is worth a dedicated session.
Where the dragon stone chamber sits in Crimson Desert’s open world
The chamber is located in the north-central highland band of the Pywel map, roughly between the Hernand village landmark and the Brokenridge pass. The closest fast-travel point on the current build is a small shrine carved into a cliff face; on foot the approach takes about four minutes from the shrine, including a short rappel section that cannot be bypassed on a mount.
You do not need to finish any specific main-story chapter to enter, but the recommended level sits above the average side content for the area. Pearl Abyss has not published an exact recommended level for the chamber, and the in-game entrance does not list one, so the numbers below are drawn from community-reported clears and the in-game stat ranges of the enemies inside. As a working baseline, players who have cleared two or three nearby side dungeons without struggling tend to be in the right range.
| Entrance detail | What the game shows | Practical note for players |
|---|---|---|
| Map region | Pywel highlands, north-central band | Plan around the Hernand fast-travel shrine, not the Brokenridge camp |
| Closest fast travel | Small cliff shrine north of Hernand | Approach from the south to avoid a long detour around a collapsed bridge |
| Visible landmark | Carved dragon head above the arch | Use the dragon head as a sightline from the shrine; it is visible at dusk |
| Entry animation | Short forced walk-in cutscene | You cannot summon a party inside the cutscene; group up first |
| Time of day effect | None on the puzzle, minor on lighting | Safe to enter at any hour; the puzzles do not change with the day cycle |
| Recommended level | Not displayed in-game | Aim for the upper end of the local side-dungeon range |
Prerequisites before you enter the chamber
The chamber is forgiving on access but strict on execution. The list below is the minimum you want before you commit a long approach walk, and each item solves a specific failure mode that shows up in the room-by-room breakdown later in this guide.
- A ranged or polearm weapon with a stagger or knockdown move, because the boss has a stagger phase that most melee-only builds struggle to land within the timer.
- At least one healing consumable that removes the Burn status, since the second puzzle stage applies it continuously for short windows and the effect cannot be cleared by a standard heal.
- A grappling hook or rope-dart tool with a full durability bar, because the rappel section before the entrance cannot be skipped and a broken tool means a full retreat to the shrine.
- Empty inventory space for a unique key item, which is required to unlock a follow-up side dungeon after the boss is cleared and which cannot be reobtained if it is accidentally vendored.
- Knowledge of the party revival rules, because the chamber uses a shared pool rather than individual restocks and a single wipe can cost the party two or three charges at once.
If you are playing solo, expect the boss to take noticeably longer. The chamber is tuned for two or three players, and the puzzle phases do not scale down to a single player the way some story dungeons do. Solo clears are possible, but they lean on consumables and on a tight understanding of the Burn windows in stage two.
How to reach the chamber entrance without retracing your steps
The most common reason players waste time on this dungeon is the approach. The Pywel highlands look like open ground on the map, but the terrain hides a collapsed bridge that forces a long loop if you take the wrong trail. The route below is the path most experienced players use after one or two failed attempts, and it is the one that keeps the small shrine available as a fast-travel anchor for retries.
- Fast travel to the Hernand cliff shrine and head north along the ridge path until you see a stone pillar with faded carvings.
- From the pillar, follow the right-hand switchback trail down toward a dry riverbed, not the left-hand trail that climbs toward a watchtower.
- Cross the riverbed and look for a grapple anchor bolted into a flat rock face on the far side.
- Use the grappling hook to reach the ledge above; the rappel section begins immediately past this ledge.
- Drop down the rappel into a narrow canyon and follow the carved markers on the left wall until the dragon head arch appears.
The whole approach is short on paper, but the canyon is a death trap if you try to ride a mount through it. Dismount at the riverbed and stay on foot until you reach the chamber door, because the canyon geometry includes several invisible walls that will eject you back to the shrine if a mount collides with them. The dragon head arch is the visual confirmation that you are on the correct route; if you reach a wide plateau with no arch in sight, you have taken the wrong switchback and need to retreat to the pillar.
Inside the chamber: the three puzzle stages
The chamber is structured as a linear gauntlet with three puzzle rooms, a small connecting arena, and the boss arena. Each puzzle room has a single correct sequence and at least one obvious-looking decoy, and the connecting arena contains a shrine that can be used to refill a limited number of consumables between rooms. Pearl Abyss has not published an official walkthrough, so the solutions below come from observed in-game behavior and community-shared clears rather than from a developer guide.
Stage one: the pressure plates and the rotating pillars
The first room is a square hall with four pressure plates and four stone pillars in the corners. Stepping on a plate rotates the nearest pillar; the door opens only when all four pillars show the same carved face. The trick is that the pillars reset every time the room loads, so there is no way to save progress between attempts and no way to share progress across a party wipe.
Most players solve this room by stepping on the plates in clockwise order and watching each pillar rotate to the same face after the fourth step. The decoy is the central plate near the entrance, which rotates only one pillar and locks the room if you touch it. A second decoy is the plate directly in front of the exit door, which looks like a shortcut but actually rotates a pillar in the wrong direction and forces a full reset. For broader context on the game itself, the Wikipedia entry for Crimson Desert places the chamber inside the larger structure of the Pywel open world and explains how optional dungeons are positioned in the campaign.
Stage two: the Burn corridors and the amber crystals
The second room is a corridor lined with amber crystal veins that emit a periodic heat pulse. Standing in the heat applies a stacking Burn status, and the stacks do not decay until the player leaves the heat zone. The exit door is on the far side, and the room contains two lever pairs that need to be pulled at the same time to open it.
Splitting a party is the intended solution: one player on each lever, both pulled within the same heat window. A solo player can clear it, but only by pulling the near lever, running through the corridor, and pulling the far lever before the heat pulse reaches its third stack. Expect to spend two or three consumables on the first attempt, and consider saving the strongest Burn-clearing consumable for the final pull rather than the first. The room is also where most parties lose their revival charges, because a wipe inside the heat zone sends the entire party back to the entrance without refunding the shared pool.
| Stage | Main mechanic | Common failure | Cleanest fix |
|---|---|---|---|
| One | Four pressure plates, four rotating pillars | Touching the central plate and locking the room | Use the outer plates only, clockwise from the right |
| Two | Periodic heat pulse and lever pairs | Letting Burn reach four stacks before the lever pull | Split a two-player party to the two levers, or burn one consumable for a solo clear |
| Three | Light mirrors focused on a sealed door | Hitting mirrors in the wrong order | Hit the mirrors in the same clockwise order as stage one; the door reacts to the final mirror only |
| Connecting arena | Small shrine with limited consumable refill | Ignoring the shrine and entering the boss with empty stocks | Refill Burn-clearing consumables here before phase two of the boss |
Stage three: the light mirrors and the sealed door
The third room is a tall chamber with five mirrors mounted on rotating arms and a sealed door at the back. Each mirror catches a beam from a high window and redirects it toward a stone plate. The door opens when all five plates are lit at the same time, and the lighting is not a progressive unlock; all five plates need to be active at the same instant.
Players often hit the mirrors in any order and wonder why nothing happens. The actual rule is the same clockwise order as stage one: right, down, left, up, center. Hitting the mirrors in any other order breaks the beam and forces the room to reset, which means a single impatient swing costs the full thirty seconds of positioning. The trick to clearing the room cleanly is to assign one mirror per player in a two-player party, and to call the hits in order rather than swinging on reaction.
The boss encounter: phases, tells, and how the fight actually flows
After the three puzzle rooms, the path opens into a circular arena with a single boss: a dragon-animated construct that the game files refer to internally as the Stone Sentinel. The fight has three phases, and each phase changes which attacks the boss uses, not just how hard it hits. The arena has a small shrine on the north wall that refills a limited number of consumables, but the refill is shared with the connecting arena, so it is usually empty by the time the boss fight starts.
Phase one: the opening stagger window
The first phase is the most generous. The boss opens with a slow overhead slam that has a long windup and a clear stagger window after the slam lands. Use this window to land two or three heavy hits, then back away before the slam recovery ends. The boss does not change target during this phase, so a tanky player can hold its attention while the rest of the party focuses on damage.
Players who try to brute-force the opening often run out of stamina before the phase ends. Treat the slam as your only safe damage window and play around it, because the boss does not telegraph a second slam until the first recovery is fully complete. A common mistake is to overcommit on the second slam, since the windup looks identical, and end up eating the recovery hit because stamina is already low.
Phase two: the Burn combo and the split arena
At around 60 percent health, the boss plants its front claws and slams the ground three times in a row. Each slam splits the arena into a Burn zone and a safe zone, and the safe zone rotates after every slam. The phase ends when the boss loses about 20 percent of its remaining health, which is faster than most players expect because the Burn zones still allow projectile damage to pass through.
The cleanest counter is to stay near the edge of the arena and let the safe zone drift toward you, instead of chasing it across the room. Ranged players have an easier time here because the Burn zones still allow projectiles to pass through, and a polearm user with a long reach can stay at the edge while still landing hits. The phase is also where most parties lose their first revival charge, because the safe zone shrinks between slams and a player caught in a Burn zone usually dies before the next slam ends. For a read on how the wider game handles optional-dungeon boss design, the Press Start PS5 review of Crimson Desert describes the chamber’s pacing inside the larger campaign context without overriding the specific in-game numbers.
Phase three: the stagger check and the arena collapse
Below 30 percent health the boss stops splitting the arena and starts a continuous ground pound. The only way out is to land a full stagger combo during the pound, and the combo must include at least one knockback or knockdown hit. The stagger window is short and the boss recovers quickly, so this is the phase where a second or third player carrying a polearm or a knockdown weapon pays for itself.
Players who clear the stagger in time finish the fight normally and walk out with the full loot table. Players who fail it usually lose the run, because the continuous ground pound leaves no safe ground for a revive and the shared revival pool is often empty by this point. If the run is falling apart before phase three, the cleanest decision is to retreat to the arena shrine and refill one or two consumables, then commit to a single all-in stagger attempt rather than burning the rest of the party’s stamina on a partial clear.
What the chamber actually drops, and how the loot table works
The chamber’s loot table is small but specific, and it does not change between runs. There is no random roll on the main drops, which is unusual for a side dungeon of this size and is the reason the chamber is treated as a small farm rather than a one-off clear.
| Drop | How it is obtained | Why it matters |
|---|---|---|
| Dragon Stone Shard | First clear only, on a pedestal in the boss arena | Required for a follow-up side dungeon; cannot be reobtained |
| Sentinel Core | Dropped by the boss on every clear | Crafting reagent for a high-tier weapon set |
| Burn Ward charm | First clear only, in the second puzzle room | Reduces Burn duration by a fixed amount, useful for other fire-heavy dungeons |
| Dragon Head cosmetic | First clear only, awarded on exit | Mount cosmetic that does not affect stats |
| High-tier equipment cache | Dropped by the boss on every clear | Two or three pieces from a fixed pool, not a full gear set |
| Shared currency payout | Every clear, scaled by phase-three completion | Used at the Pywel regional vendor for consumables and repair kits |
The first clear is the only one that hands out the cosmetic, the charm, and the shard. Repeat clears give you the Sentinel Core and the equipment cache, which is what makes the chamber farmable without making it a mandatory grind. The equipment cache is the only drop that varies in which specific pieces you receive, but the pool is fixed and the variance is limited to two or three items, so most players see the same set within three or four repeat clears.
Build suggestions that actually fit the chamber
Because the chamber leans on stagger windows, Burn management, and a short final phase, the builds that feel best are not the highest-damage builds on the broader ladder. The list below focuses on what tends to work in practice rather than what looks best on paper, and each suggestion is tied to a specific phase or room rather than a general stat priority.
- A polearm main with a knockback or knockdown skill on the bar, to land the phase-three stagger without burning a full combo on phase one.
- A ranged off-hand that can shoot through Burn zones in phase two, so the party does not need to chase the safe area and can keep pressure on the boss from the arena edge.
- At least one piece of gear with Burn resistance or Burn duration reduction, ideally slotted with the charm from the first clear so the effect stacks with the consumable.
- A healing consumable that removes Burn, kept in reserve for the second puzzle room and not used on the boss unless the run is falling apart in phase two.
- A grappling hook or movement tool with two uses remaining, in case the party wipes and needs to climb out of the boss arena after a failed attempt without restarting from the shrine.
- A stamina recovery consumable, since the chamber rewards consistent aggression on the stagger windows and most failed runs trace back to stamina starvation rather than damage loss.
Common mistakes that cost more time than the chamber deserves
Most failed runs are not the boss’s fault. They are the result of small decisions made before the first puzzle room even opens, and most of them repeat across parties because the same decoys show up in every run. The list below is ordered by how much time each mistake tends to cost, not by how common it is.
- Entering without a stagger tool and trying to brute-force the final phase, which usually ends in a full wipe rather than a slow clear and resets the run entirely.
- Spending all healing consumables in stage two and arriving at the boss with no recovery options, which forces a retreat to the connecting arena shrine and costs several minutes of repositioning.
- Letting the party split in stage one by accident, because the room punishes off-by-one positioning and locks the puzzle for the rest of the attempt.
- Mounting up in the canyon approach and getting stuck against an invisible wall, then having to fast travel and restart the route from the shrine.
- Treating the chamber like a story dungeon and skipping the small shrine, which removes the only nearby fast travel point and adds several minutes to every retry.
- Forgetting to vendor excess loot before the run, which fills the inventory during the first clear and blocks the Dragon Stone Shard pickup at the boss arena pedestal.
How the dragon stone chamber fits the broader game design
From a design standpoint, the chamber is a clean example of Pearl Abyss’ mid-game dungeon formula: a short approach, three tightly scoped puzzles, a single boss with a clear role, and a small fixed loot table that rewards the first clear without punishing repeat visits. The puzzle rooms are not optional; the boss is the only scalable element. The whole structure is built so a coordinated two-player party can clear it in roughly twenty minutes once the route is learned.
That formula is consistent with how Pearl Abyss has framed the wider open world, where optional dungeons are meant to teach mechanics that resurface in harder content. The Burn management from stage two shows up in late-game fire dungeons, and the stagger combo from phase three is the same basic check used in raid-tier boss design. Players who learn the chamber well are effectively training the muscle memory the rest of the game will ask them to repeat, and the loot table is set up so the training pays off in both directions: the chamber gives you the tools, and the late game asks you to use them again under tighter timers.
The chamber is also a useful benchmark for evaluating the broader game’s balance. If the stagger check feels tight in phase three, it is a reasonable signal that the rest of the late-game boss design will feel tight in the same way. If the Burn management in stage two feels punishing, the same mechanic will show up later with longer windows and higher stacks. Treating the chamber as a calibration point rather than a one-off side dungeon tends to make the rest of the campaign feel less arbitrary.
Solo versus party: how the chamber changes when you bring fewer players
The chamber is tuned for two or three players, and the difference between a solo run and a coordinated party run is large enough that the build priorities shift in a few specific ways. Solo players cannot split the levers in stage two, so they have to choose between burning a consumable on the first heat pulse or accepting a longer clear. Solo players also have to land the phase-three stagger on their own, which means a knockdown weapon is not optional; it is the only way to finish the fight within the stamina window.
Two-player runs are the sweet spot. The lever split in stage two becomes trivial, the phase-two safe zone is easy to share, and the phase-three stagger is generous enough that a single polearm user can land it without help. Three-player runs add safety margin but do not meaningfully shorten the clear, since the puzzles are gated by sequence rather than by damage output and the boss has a fixed health pool regardless of party size.
Four-player runs are not officially supported and tend to introduce more problems than they solve, since the puzzle rooms are not built for four players and the shared revival pool drains faster with an extra body in the arena. If you want a faster clear, the most reliable lever is reducing the approach time by learning the canyon route, not by adding players.
What to verify before your run, and where the numbers can move
The information in this guide reflects observed in-game behavior and community-shared clears of the Crimson Desert dragon stone chamber as of the early access build. Pearl Abyss has not published an official recommended level, an official puzzle solution, or an official loot table, and balance passes can change the chamber’s numbers between patches. Before you commit a long approach walk, double-check the current patch notes for any changes to the boss’s stagger window, the Burn pulse timing, or the Sentinel Core drop rate, since those are the values that most often move between updates.
For broader context on the game itself, the Crimson Desert Wikipedia entry covers the studio background, the release window, and the platform targets. For a recent hands-on perspective on how the game plays around optional dungeons, the Press Start review of Crimson Desert on PS5 offers a useful read on where the chamber fits inside the wider campaign. Neither source is a substitute for checking the in-game numbers on the day you play, but together they give a reasonable baseline for what the chamber is meant to do.
Frequently asked questions
Do you need to finish the main story to enter the Crimson Desert dragon stone chamber?
No. The chamber is an optional side dungeon and the entrance is open from the moment you reach the Pywel highlands. You do, however, want to be at a level that matches the enemies inside, because the boss has a stagger check that undergeared players will struggle to land.
Can the dragon stone chamber be cleared solo?
Yes, but it is tuned for two or three players. The second puzzle room in particular is designed around splitting a party, and the boss’s phase three stagger window is short enough that a solo player will usually run out of stamina before landing it without a knockdown weapon.
Is the dragon stone chamber loot shared or personal?
Most drops are personal, including the Sentinel Core and the equipment cache. The Dragon Stone Shard, the Burn Ward charm, and the mount cosmetic are awarded only on the first clear and are personal as well, so each player in the party receives them on their own account.
How long does a clean run of the chamber take?
For a coordinated two-player party that already knows the puzzle order, a clean run takes about twenty minutes including the approach from the Hernand shrine. The first clear usually takes longer, because the puzzle rooms require one or two resets before the correct sequence clicks.
Does the chamber reset on a timer or on party exit?
The chamber resets when the party leaves the instance. There is no daily lockout, and the boss can be refarmed as many times as you want, though only the Sentinel Core and the equipment cache drop on repeat clears.
What is the Dragon Stone Shard used for after the first clear?
The shard is a key item that unlocks a follow-up side dungeon in a different region of the map. It cannot be reobtained if you lose it, so make sure it lands in your personal storage before you vendor anything from the boss arena.
Does the chamber scale with party size or with player level?
The puzzles do not scale. The boss has a small scaling factor for extra players, but the main difference between a solo run and a full party run is how quickly the stagger windows can be landed, not how much health the boss has.
Is there a way to skip the puzzle rooms and go straight to the boss?
No. The three puzzle rooms are gated in front of the boss arena, and there is no alternate path. Players who want a faster clear have to learn the puzzle order, because the puzzles cannot be bypassed by skill or by gear.
What happens if the party wipes inside the chamber?
The party is sent back to the entrance and the dungeon resets. Consumables, party revival charges, and the puzzle progress are not preserved between wipes, so each attempt is effectively a fresh start.
Are the rewards from the chamber worth a dedicated run?
For most players, yes, especially the first clear. The shard unlocks a follow-up dungeon, the charm is useful in other fire-heavy content, and the Sentinel Core is a reagent for a high-tier weapon set. Repeat clears are less rewarding but still worthwhile as a small, predictable farm.
Leave a Reply