



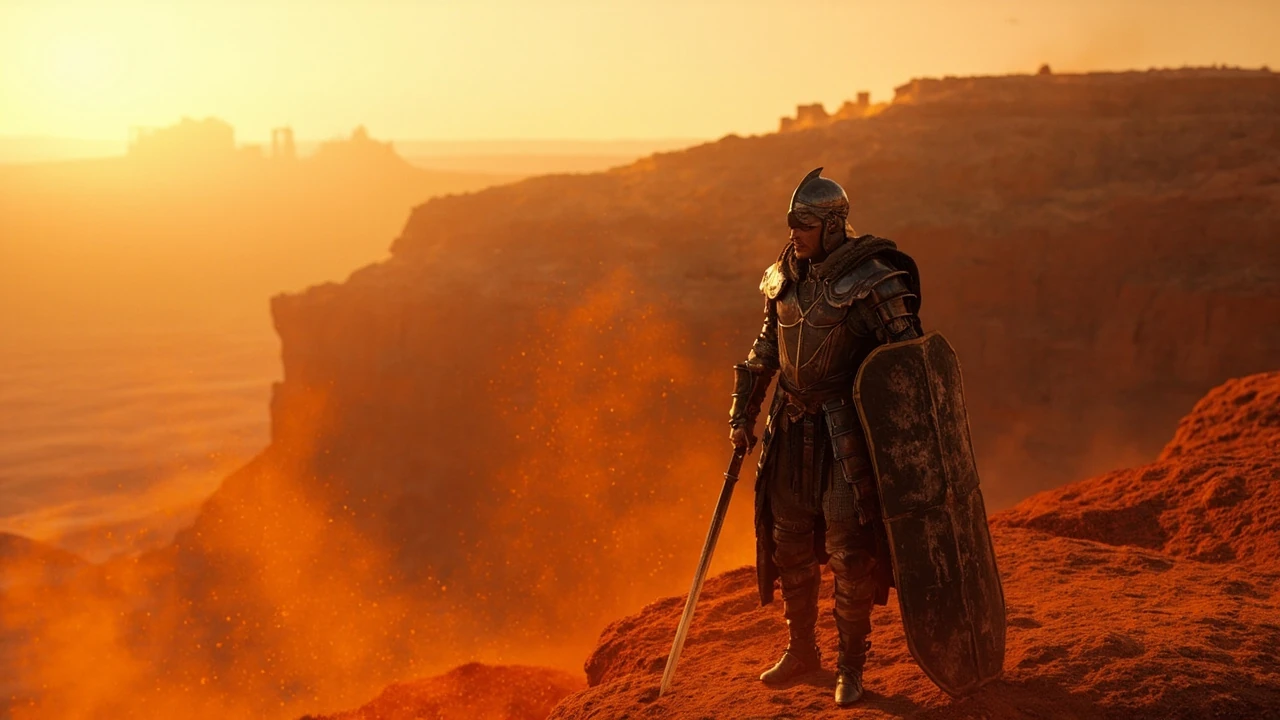

Crimson Desert walkthrough: how to read this guide and what it actually covers
A practical Crimson Desert walkthrough has to do two jobs at once. Players want a route through the main story without losing hours to side content they cannot evaluate, while developers and designers want to understand how Pearl Abyss has translated the structural DNA of Black Desert Online into a single-player open-world action RPG built on the same BlackSpace engine. This page treats both readers honestly. The first half follows the player through the opening act, the central conflict with the Greymanes faction, and the mission rhythm that governs combat, exploration, and party management. The second half turns that player-facing progression into a design breakdown, looking at how the mission order, ability gating, and open-world density serve the kind of experience Crimson Desert is trying to ship.
Because Crimson Desert launched as a single-player title with a persistent world, the same walkthrough questions appear in both reading modes: which missions gate which regions, when the combat system opens up, and how much the game expects the player to engage with its camping, crafting, and mounted travel systems before the next story beat. The structure below mirrors that order. The early sections focus on what the player needs to do. The later sections step back and ask why those missions are sequenced that way, what trade-offs the designers made, and what a similar open-world project can learn from the result.
Getting started in Pywel: the opening hours and first real combat encounters
Crimson Desert drops the player into the southern continent of Pywel as Kliff, a mercenary captain of the Greymane Fallen Knights. The opening hours are deliberately compressed: a short, linear set-piece on the road into the city of Hernand, a betrayal that scatters the company, and a first set of combat tutorials that introduce the game’s stance-based melee system, parry windows, and stamina economy. The walkthrough through this section is largely fixed because the game does not expose meaningful branching here. The mission flow is designed to make sure the player meets every core system at least once: light and heavy attacks, dodge and parry, ranged weapons on horseback, and the early ability slots that will be filled throughout the campaign.
The Hernand sequence also introduces the visual language that defines Pywel. Vast horizons, color-coded biomes, and a sky that changes in step with the day-night cycle and weather. Pearl Abyss has used the BlackSpace engine to keep draw distance, vegetation density, and crowd simulation consistently expensive across the open world, so the early missions sit the player in towns, camps, and small forts where that cost is easier to budget. The walkthrough for any new save should treat this as an onboarding period. Read the tutorial pop-ups, fail a parry on purpose to see how the recovery frames work, and spend the first evening riding around the immediate Hernand outskirts to learn how fast the mounted controls feel before the game assumes fluency on the road to Venn.
Combat basics worth learning in the first hour
- Stance switching: light attacks chain into stance-specific finishers, and switching stance mid-combo opens or closes different punish windows.
- Parry timing: parries are not a panic button, they reward reading the telegraph and committing inside a small window before the strike lands.
- Stamina and poise: heavy attacks and charged skills spend both stamina and a poise resource that recovers slowly, so trading hits is rarely the correct answer.
- Ranged fallback: bow and throwing weapons are intentionally weaker than melee but matter when the game drops mixed groups or mounted enemies at range.
None of these systems is fully explained in a single tutorial. The walkthrough treats them as the first set of habits to build, because the Greymane patrol encounters in the second chapter assume the player already knows when to parry, when to retreat, and when to dismount.
Chapter structure and mission order: how the campaign is paced
Crimson Desert’s main story is delivered as a sequence of named arcs rather than a flat quest log. Each arc concentrates on a region, a faction, and a set of boss encounters, and most arcs open with a travel beat that doubles as an open-world density test. The walkthrough is easier to follow if the player thinks in arc units rather than mission units, because the gating logic is regional: finishing the southern Hernand arc unlocks the central Venn basin, finishing Venn unlocks access to the northern frontier and the mountain chapters, and so on. Side content is allowed to be skipped within an arc, but the arc itself is linear.
This is a deliberate choice. The campaign has to teach a long list of combat, traversal, and party systems without forcing the player to grind, and arc-level gating lets the designers guarantee that a given tool is available when the story needs it. Mounted combat is fully usable by the second arc. Pawn-style party commands are introduced in the third arc. Late-game siege content opens only after the player has seen every core combat system in isolation. A walkthrough that tried to skip ahead would either miss those tutorials or get crushed by enemies that scale against the player’s toolset rather than their level.
How to read the arc map
The arc map is not a literal menu, but the regions, towns, and forts in Pywel line up with the story in a predictable way. The following table summarizes the practical structure the walkthrough uses for planning, the systems each arc introduces, and the open-world density the player should expect around the arc’s main hub.
| Story arc | Main hub | Systems introduced | Open-world density |
|---|---|---|---|
| Hernand betrayal and recovery | Hernand and surrounding camps | Core melee, parry, early party | Low to medium, friendly to exploration |
| Venn basin conflict | Venn city and river forts | Mounted combat, ranged, first sieges | Medium, mixed patrols and camps |
| Northern frontier and the mountain passes | Frontier town and monastery chain | Pawn command, advanced stance combos | High, contested zones and fast travel gates |
| Late-game consolidation arc | Multiple hubs in Pywel | Endgame crafting, elite encounters, sieges | High across the whole map |
The walkthrough plan is straightforward: finish the Hernand recovery arc without detouring, then use the Venn arc to lock in mounted combat, then push into the frontier arc with the full party toolset available. This mirrors how Pearl Abyss has described the intended difficulty curve and gives the player the cleanest experience of each system.
Main missions in the Hernand recovery arc
The Hernand recovery arc is the most linear of the four. It is structured around rebuilding the Greymane company after the opening betrayal, recovering named allies, and clearing a small set of camps and patrol bosses in a defined order. Because the player cannot meaningfully change difficulty here, the walkthrough focuses on the order in which the game expects the missions to be completed and the mechanical lessons each mission enforces.
Mission order in the Hernand arc
- Escape the ambush outside Hernand and reach the safehouse in the lower city. Teaches parry timing against a small group of mixed melee and ranged enemies.
- Reunite with the first named ally, who becomes the default pawn companion. Introduces the pawn command wheel and how party AI responds to stances.
- Clear the outer camps around Hernand. First exposure to camp crafting, camp defense waves, and the resource loop that the rest of the game uses for fast travel and gear upgrades.
- Confront the Hernand-area lieutenant boss. Enforces stamina and poise management because the boss punishes panic rolling and rewards committed parries.
- Take the southern road to the Venn basin border. First long mounted ride and first introduction to dynamic events on the road.
The walkthrough treats these as a fixed sequence. The temptation to over-explore is real, because the Hernand basin is visually rich, but the open-world density in the early game is tuned for curiosity, not for challenge. Roaming too far from the mission flag before the party is fully assembled tends to pull the player into high-level patrol encounters that the combat system is not yet designed to handle.
Combat system: stance, parry, poise, and how to read boss tells
Crimson For additional context, Desert’s combat is the single biggest determinant of pacing in the walkthrough. The system is built on four interacting resources: health, stamina, poise, and a stance gauge that tracks which melee archetype the player is currently committing to. Every weapon family favors a different stance, and switching stance mid-combo changes the next combo step rather than queuing an entirely new move. The walkthrough reads this as a parry-first, stance-second, heavy-third system. Parry and dodge form the safety layer. Stance switching and combo extension form the damage layer. Heavy attacks and charged skills are the spend layer, used when the enemy has opened a real punish window.
Enemy design follows the same logic. Light enemies in the early game have short combos, generous parry windows, and low poise. They exist to teach the safety layer. Mid-bosses in the Venn and frontier arcs combine longer combos, mixed timings, and a small set of stance-specific punishes. They exist to teach the damage layer. Late-game bosses add poise damage, arena hazards, and multi-phase transitions that test whether the player can keep all three layers running at the same time.
How to read a boss before you attack
- Watch the opening combo twice. The first pass exists to learn the timing, not to deal damage.
- Identify the stance the boss uses most. Most late-game encounters have one stance they punish with a longer combo and one stance they interrupt with a faster recovery.
- Find the poise break. Every boss has a posture mechanic, and the walkthrough plan is to build poise damage with light chains, then spend the break on a heavy finisher.
- Note arena hazards. Late bosses in the frontier and consolidation arcs place hazards in the punish windows, so the player has to choose between damage and positioning.
This is also where the design lessons start to show. Crimson Desert’s bosses are tuned to reward a particular decision each phase, and that decision depends on systems the player has been assembling across multiple arcs. A walkthrough that tries to brute force late bosses by leveling is slower and less reliable than one that respects the system’s intended reads.
Mounted combat, travel, and how the open world is actually used
Mounted combat is a story unlock, not a starting skill, and the walkthrough treats it as the defining gameplay change between the Hernand and Venn arcs. Horses in Crimson Desert are not a traversal convenience. They are a weapon system. The mounted combat layer uses the same parry and poise economy as the on-foot layer, but it adds a momentum variable that affects stagger, turning radius, and which attacks can connect against a moving target. The game also uses the mount as a positioning tool for siege and large-scale encounters, because the on-foot camera and stamina budget get very tight when the player is surrounded.
Travel has the same dual purpose. The BlackSpace engine draws Pywel as a continuous space, and the designers use long rides as pacing beats between arcs. Road encounters, dynamic events, and ambush spawns are placed on the most likely routes between hubs, so the walkthrough plans for a specific travel rhythm rather than fast travel spam. Fast travel exists, but it is gated by camp upgrades and resource cost, which keeps the open world present without forcing a slow pace on every trip.
Open-world density by region
The table below is a planning tool, not a guarantee. Crimson For additional context, Desert’s open world is dynamic, so density shifts with the time of day, weather, and story state. The numbers describe the rough encounter budget the player should expect on a typical road trip in the named region.
| Region | Typical road length | Encounter budget | Recommended pace |
|---|---|---|---|
| Hernand basin | Short, clustered | Low, mostly scripted | Walk or slow ride, learn the basics |
| Venn basin | Medium, river-controlled | Medium, mixed patrols and events | Steady mounted pace, stop for dynamic events |
| Northern frontier | Long, mountain passes | High, contested road | Plan around camps, not direct rides |
| Late-game consolidation | Variable, multi-region | High, region-aware | Use fast travel when available, ride for content |
The walkthrough plan is to slow down in the Hernand basin, settle into a steady mounted pace through the Venn basin, and treat the northern frontier as the moment to start using camp systems as a logistics layer rather than a side activity.
Pawns, party management, and the AI command layer
Crimson Desert inherits the concept of companion characters from Black Desert Online, but the single-player context changes how the system works. Pawns are recruited through story missions and select side content, and they are managed through a command wheel that lets the player pick a stance, an aggression level, and a target priority. The walkthrough treats the pawn system as a multiplier on the player’s combat plan, not a substitute for it. A well-commanded pawn covers the player’s weak side, opens poise breaks, and absorbs arena hazards. A badly commanded pawn pulls aggro at the wrong time and forces the player out of a planned combo.
The most useful design lesson here is that the pawn system is reactive, not autonomous. Pearl Abyss has built the AI to follow the player’s stated intent rather than to make its own tactical decisions, and the walkthrough reflects that by encouraging the player to set the command state before entering a boss arena. The frontier arc is the first place where the game tests this: the monastery siege chains assume the player can split the party’s attention across multiple lanes, and the command wheel is the tool that makes that possible.
What the command wheel does and does not do
- It sets the pawn’s default stance and aggression, which determines whether the pawn commits to combos or stays in a support role.
- It sets a target priority, which matters most in mixed-group fights where the player wants the pawn to peel a ranged enemy or guard a flank.
- It does not pause the game. Commands are queued, and the pawn will switch targets on the next free frame, which is why the walkthrough recommends setting the command state before combat.
- It does not change difficulty. A well-commanded pawn does not make a hard fight trivial, it makes a hard fight readable.
Camping, crafting, and the resource loop that holds the open world together
Crimson Desert’s camp system is the bridge between story arcs and open-world content. The player can establish camps at designated points in each region, assign workers, and use the camp as a fast travel point, a crafting hub, and a defense event. The walkthrough treats camps as a logistics layer that needs to be set up early, even in the Hernand arc, because the resource loop they unlock feeds the upgrade paths for the player’s gear, the pawn’s equipment, and the fast travel network that the late-game arc expects to use.
Crafting itself is intentionally compressed. Weapons, armor, and consumables are the main categories, and each category has a small number of upgrade tracks that matter for the player’s build. The walkthrough does not require the player to master every track. The frontier and consolidation arcs assume a baseline of weapon and armor upgrades, plus a steady supply of consumables for boss fights. The resource loop is tuned so that a player who engages with camps as they unlock them will have enough material for the relevant upgrades without grinding.
Crafting priorities by arc
- Hernand arc: focus on weapon upgrades that match the player’s chosen stance and on consumables that buffer parry timing.
- Venn arc: add armor upgrades and the first pawn equipment pieces, since the party encounters begin to assume both.
- Frontier arc: open the camp fast travel network and invest in the resource tiers needed for late-game crafting.
- Consolidation arc: complete the build-defining upgrades and stockpile consumables for the siege and elite content.
Siege and large-scale encounters: how the open world tests the full toolkit
The frontier arc introduces the first siege encounters, and they are the moment where every system the walkthrough has been building comes together. Sieges in Crimson Desert are not scripted set-pieces. They are multi-lane combat arenas where the player has to manage mounted positioning, pawn commands, camp resources, and stamina economy across a much longer fight than a single boss. The design lesson is that the open world is not a backdrop to the story. It is the resource layer that makes the story’s hardest fights possible.
Late-game sieges in the consolidation arc raise the stakes by adding enemy command units that buff nearby troops, environmental hazards tied to the region, and multi-phase structure that rewards the player for using fast travel and camp logistics to manage pacing. The walkthrough plan for these encounters is to enter with a full consumable stack, a clear command state for the pawn, and a route through the arena that the player has already scouted on foot. Trying to brute force a siege by charging the gate is the single most common late-game failure the walkthrough tries to head off.
What a successful siege plan looks like
- Scout the arena on foot before the siege flag is taken, because terrain features change once the siege is active.
- Set pawn commands before the first wave, with a clear target priority for the enemy command unit.
- Use the mount for positioning between lanes rather than for direct damage, because the mounted stamina budget is too tight to sustain a full fight.
- Consume resources on the second wave rather than the first, so the player has a buffer for the elite phase.
Design lessons from the Crimson Desert walkthrough for developers
For a reader who is using the walkthrough as a design reference rather than a player guide, the most useful patterns are the ones that the mission order assumes. The campaign is not just a sequence of fights. It is a curriculum, and each arc gates a system that the next arc depends on. Mounted combat, pawn commands, and the camp resource loop each get their own dedicated space in the campaign because the rest of the systems are designed to lean on them.
The combat system itself is a case study in layered resource design. Health, stamina, and poise are not just three bars. They are three different timers that punish different mistakes, and the enemy roster is tuned so that each timer has a dedicated answer. Light enemies punish the player for ignoring stamina. Mid-bosses punish the player for ignoring poise. Late bosses punish the player for ignoring all three at once. A project that wants to ship a similar action RPG has to commit to that layering, because the difficulty curve only feels fair when each arc introduces exactly one new layer.
What a similar project can borrow directly
- Arc-level gating instead of flat mission gating, so that systems unlock in a curated order rather than a grind order.
- Mounted combat as a story unlock that doubles as the open-world traversal layer, rather than a separate mode.
- Pawn commands as a reactive tool the player sets before combat, not an autonomous AI that makes decisions for the player.
- Camp systems as a logistics layer that ties crafting, fast travel, and defense encounters into a single loop.
What is harder to copy without the BlackSpace engine
- Continuous open-world draw distance and crowd density, which BlackSpace handles but most mid-budget engines struggle to sustain.
- Mounted combat that feels the same on foot and on horseback, which requires animation and physics work that is rarely the first thing a new studio budgets for.
- Dynamic events on the road that scale with the player’s progression, which need a persistent world layer the walkthrough plan has to assume is present.
Frequently asked questions
How long is the Crimson Desert main story?
The main story runs roughly 35 to 50 hours for a player who follows the recommended arc order, focuses on main missions, and engages with the camp resource loop at a steady pace. Players who add the optional frontier and consolidation side content can expect 60 hours or more before reaching the endgame, and completionist players can push well past that on siege and elite content.
Is Crimson Desert an online game or a single-player walkthrough?
Crimson Desert launched as a single-player open-world action RPG built on the same engine lineage as Black Desert Online. The walkthrough plan treats it as a single-player experience. Some persistent-world features, such as the camp network and dynamic road events, exist because the engine supports them, but the main campaign does not require online play.
What is the best starting weapon for a first-time player?
For a first-time player, the most forgiving choice is a balanced sword and shield setup that supports both the light and heavy stance layers. The walkthrough recommends avoiding a pure heavy weapon for the Hernand arc, because the parry layer has to be learned before the stamina and poise layers can be relied on, and a sword and shield build exposes the player to all of them without forcing a commitment to one.
Do I need to engage with camp crafting to finish the walkthrough?
Yes, in a limited way. The Hernand arc can be completed with the starter gear and consumables, but the Venn and frontier arcs assume a baseline of weapon and armor upgrades plus a small consumable buffer for boss fights. The walkthrough plan opens a camp in each region as it unlocks, invests in the relevant upgrade tracks, and uses the camp as a fast travel point. Players who skip the camp loop entirely will run into resource shortages by the frontier arc.
When does mounted combat unlock?
Mounted combat unlocks in the Venn basin arc, after the player has finished the southern road mission that takes the company from Hernand into the central river region. The walkthrough recommends treating that mission as the moment to start practicing mounted parry timing, because the Venn patrols and the frontier siege chains both assume the player can fight from the saddle.
How does the pawn system work in combat?
Pawns are companion characters that follow the player’s combat plan through a command wheel. The player sets a stance, an aggression level, and a target priority before combat, and the pawn executes that plan during the fight. The walkthrough treats the command state as something to set before the first encounter in a new region, not something to adjust mid-fight, because commands are queued rather than instant.
Are there difficulty settings in Crimson Desert?
The campaign is tuned around a single intended difficulty curve, and the walkthrough plan is written for that curve. Some encounters can be made easier or harder by adjusting the camp resource investment and the consumable buffer, but the underlying combat system does not change. Players who want a harder experience generally do so by reducing camp upgrades, not by toggling a menu option.
Can the walkthrough be done without exploring the open world?
Technically yes, but the design intent is that the open world is part of the curriculum. The walkthrough recommends engaging with the open world at the pace the arcs assume, because the camp resource loop, the mounted combat system, and the pawn command layer are all part of the difficulty curve. Skipping the open world entirely tends to produce a player who reaches the consolidation arc without the systems the arc was designed to test.
Where does Pearl Abyss fit the Crimson Desert engine in the studio’s roadmap?
According to the public materials around the game, Crimson Desert is built on a derivative of the BlackSpace engine that has powered Black Desert Online. The walkthrough does not need engine details to plan a route, but readers who want the developer-facing context can review the studio’s official page on the series and the broader engine work on the Black Desert Wikipedia entry.
What is the best next step after finishing the main story?
The consolidation arc and the late-game siege content are designed as the natural follow-up to the main campaign, and the walkthrough plan treats them as part of the same progression. Players who want a different next step can revisit the frontier arc on a harder self-imposed setting, or focus on the camp resource loop to push the elite encounters. Independent coverage of the endgame is also a useful reference, and readers can compare the open-world design notes against the review notes published in the wider gaming press, such as this Crimson Desert review at Press Start.
Leave a Reply